Accepting registrations for career fairs in Handshake
1. Be sure you are in your Career Services/admin Handshake account.
2. In the black sidebar on the left-hand side of the page, click on the "Fairs" tab in the "Schedule" section.

3. From the list of fairs at the top of the page, click on name of the fair that you would like to review.

4. Near the top left of the page, click on the green button that says "(#) total employer registrations (#) pending."

5. Notice the gray bar near the top of the page with many tools to use for searching employer registrations. Familiarize yourself with them. They will be handy when you have many registered employers and registration requests.

6. Click on the name of the organization whose registration you want to review.

7. Review the employer registration request:
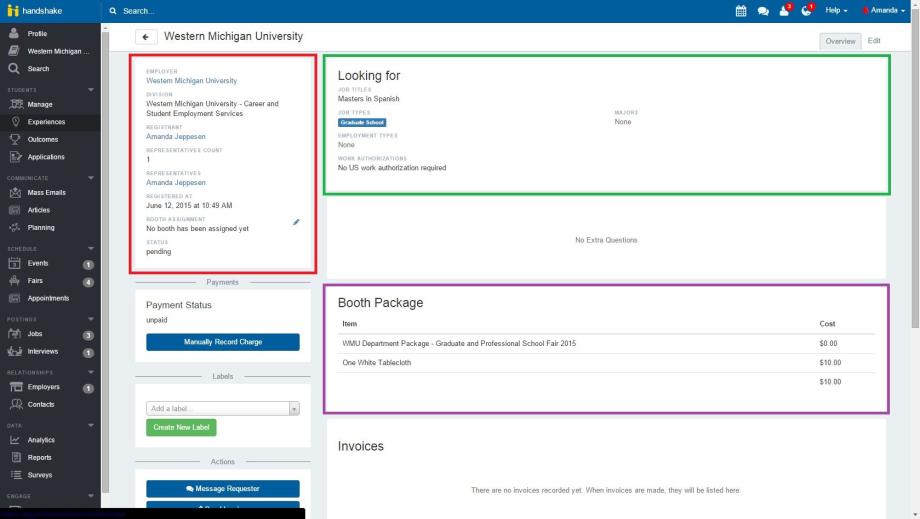
- Check the general information provided in the box at the top left corner of the page (red box below).
- Be sure the information provided in the "Looking for" box at the top of the page makes sense in the context of the event (green box below).
- Review the items chosen in the "Booth Package" box hear the middle of the page (purple box below).
- Scroll down the page.
- Read the information in the "Employer Description" box hear the bottom on the left side of the page (red box below).
- If you have any questions for the requester, you can message them within Handshake using the blue "Message Requester" located near the middle of the left side of the page (purple box below). If you would like, you can also contact them outside of Handshake using the information provided in the "Contact Information" box at the bottom left corner of the page (blue box below).
- If you have any edits to make on the spot or after the requester has answered your questions, scroll all the way up the page and click on the "Edit" tab at right-hand side of the page near the top of the screen.
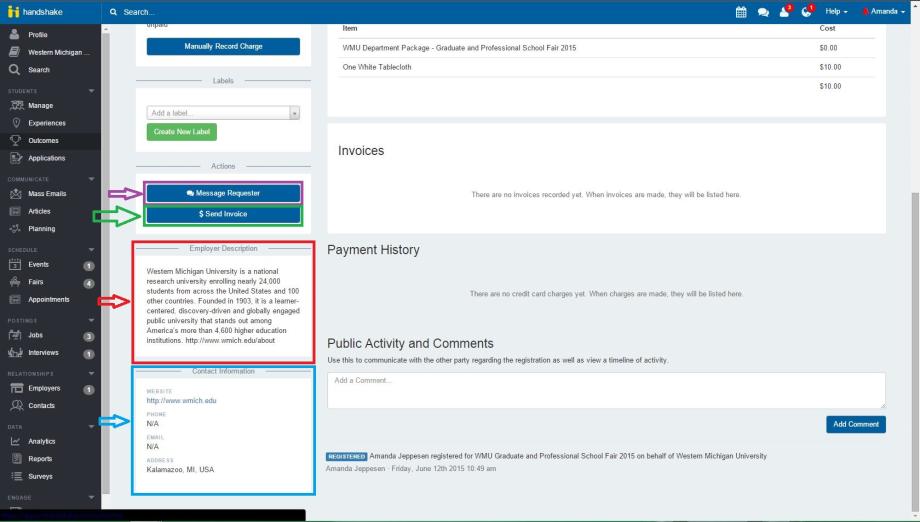
8. Once you are sure the registration is accurate, click on the blue "$ Send Invoice" button located near the middle of the left side of the page (green box above).
9. When you receive the payment either by check or through TouchNet, click on the blue "Manually Record Charge" button located in the "Payment Status" box near the top left side of the page (red box in first screenshot). Fill in the pertinent information in the subsequent popup box (second screenshot).


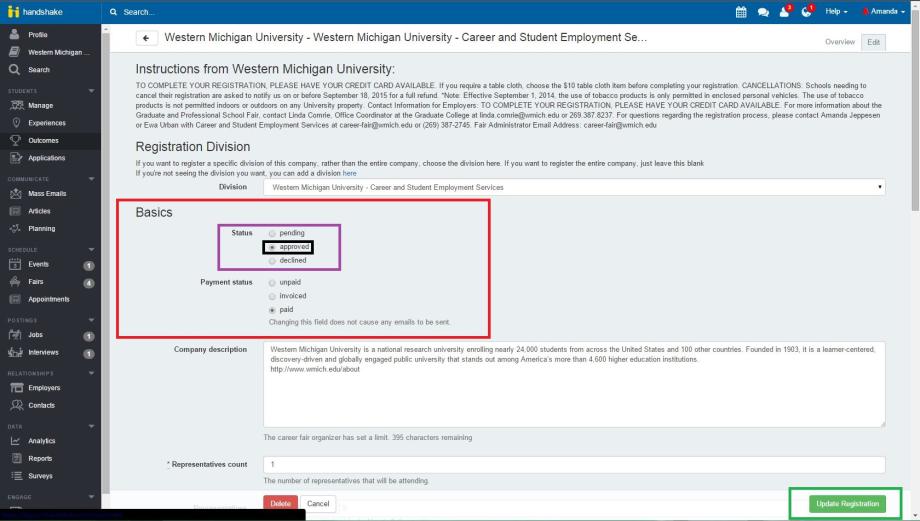
10. After you enter the payment, click the "Edit" tab at the top right corner of the page.

11. Under the "Basics" section (red box), find the "Status" subsection (purple box). Change the status to "approved" (black box), and the click the green "Update Registration" button at the bottom right corner of the page (green box).